Forms are configurable pages that administrators can create to capture structured data within a project. They act as digital log sheets and are commonly used to support Quality Control (QC) tasks such as table checks or audit tracking.
The Forms feature allows users to create, manage, and organize customized data collection forms for surveys and field operations. Forms can be designed with different field types to capture the required information accurately and consistently during data collection.
Admins can:
- Create custom forms with tailored fields.
- Configure data types for each field.
- Define Export Forms to extract only selected fields for Excel reporting.
When to Use This Feature
Use custom forms when you need to:
- Standardize manual QC tracking (e.g., table checks, validations)
- Capture additional structured data not covered in standard workflows
- or standardize any similar QC and tracking process
Prerequisites
- Administrator access to Administration and Settings
- Permission to create and manage forms
- Required field definitions and response options have been planned.
How to Create a Form
Step-by-Step Instructions
-
Open Forms Settings
- Click the gear icon in the top-right corner to go to "Administration and Settings".
- In the left panel, click "Forms".
-
Create a New Form
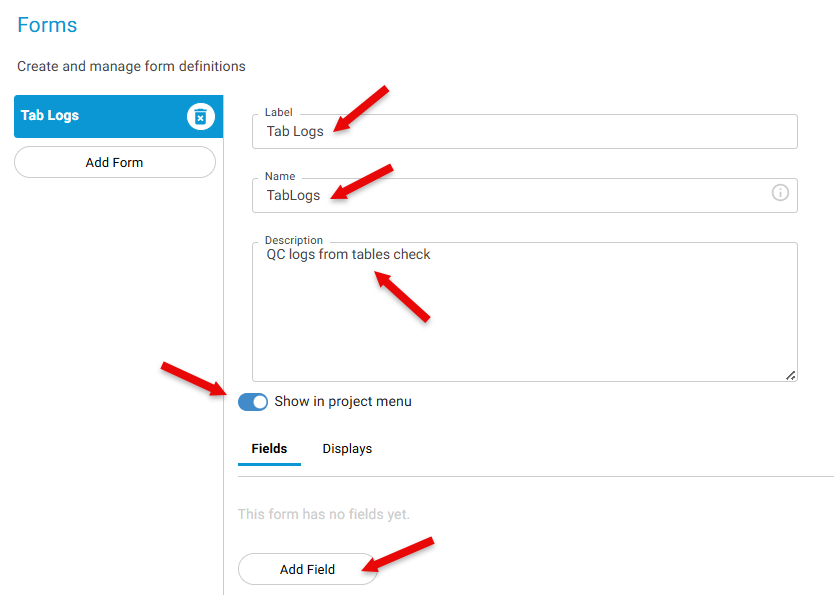
- Click "Add Form".
- Enter the following details:
- Form Label: Display name shown to users.
- Form Name: Internal or system name.
- Description: Brief explanation of the form’s purpose.
-
Enable Form Visibility
- Toggle the option to Show in Project Menu.
- This ensures end users can access the form.
-
Add Fields to the Form
- Click "Add Field" to start configuring form fields.
-
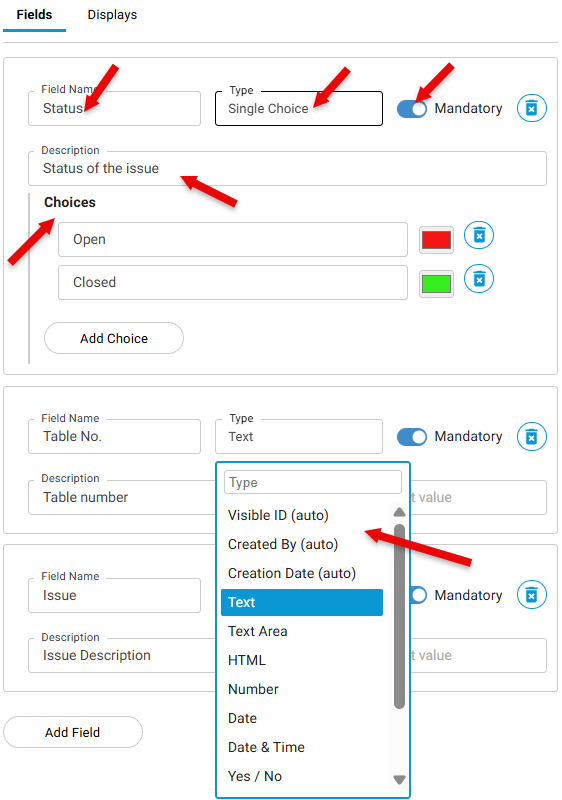
Configure Field Details For each field, provide the following:
a. Field Name
- The label displayed on the form interface.
b. Field Type
Select the appropriate data type based on the information you want to capture:
- Text – Single-line input
- Text Area – Multi-line input for longer responses
- HTML – Rich text or formatted content
- Number – Numeric input only
- Date – Date picker
- Date & Time – Timestamp input
- Yes / No – Boolean selection
- Single Choice – Select one option from a predefined list
- Multiple Choice – Select multiple options from a predefined list
- Comments – Field for user remarks or notes
- Tags – Allows users to add any number of custom text labels to a record. Tags can be used to categorize, organize, and quickly identify records based on keywords or relevant attributes.
- Images – Allows users to upload one or more images directly to a record.
- System Generated Fields - Visible ID (auto), Created By (auto), Creation Date (auto); these fields are auto field by the system
c. Choice Values (if applicable)
- Required for:
- Single Choice
- Multiple Choice
- Define the list of selectable options.
-
Add Multiple Fields
-
Repeat the process to add as many fields as required.
-
Fields will appear in the form in the order they are created (or configured).
-
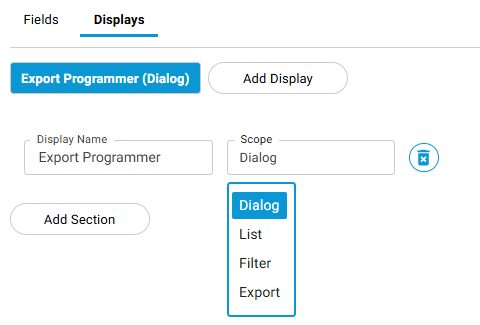
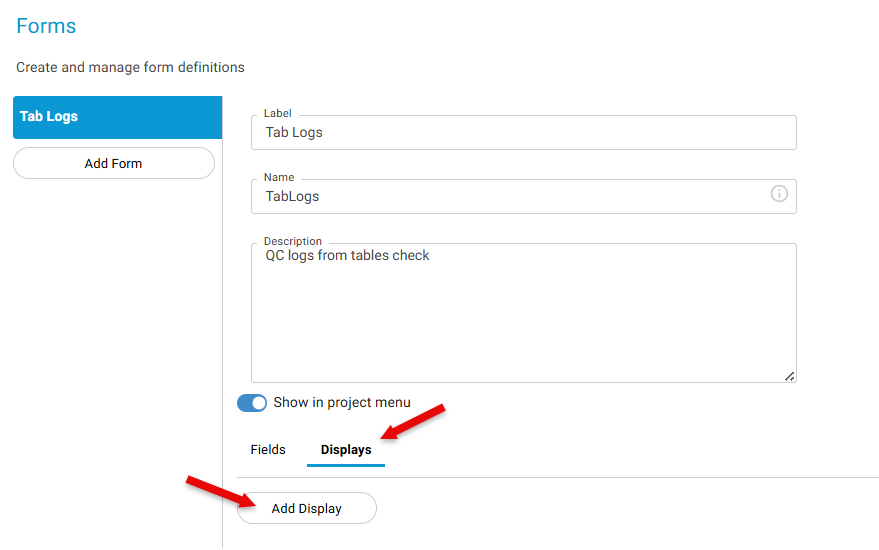
Once all the fields are added, you are now ready to "Add Display" from the Display tab.
Section Colors and Tabs
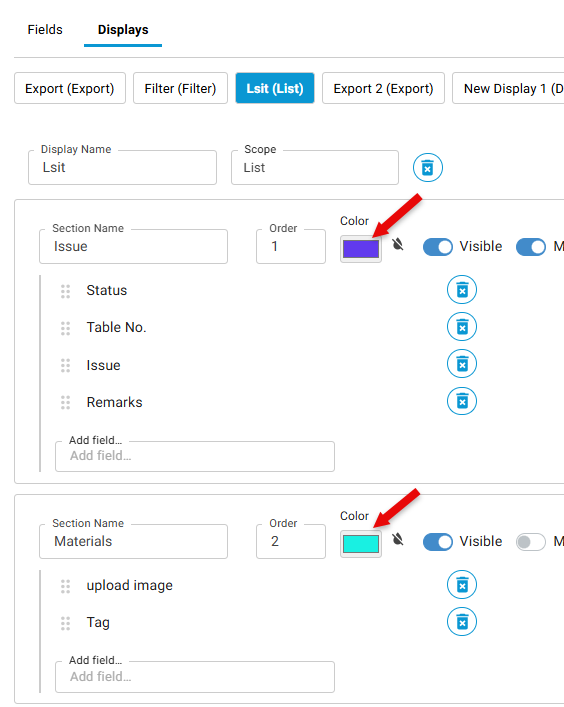
Forms can be organized more effectively by customizing how sections are displayed. Each section can be assigned a background color, helping users quickly identify different areas of a form in both the record dialog and the records list. Additionally, sections can be displayed as tabs within the record dialog instead of a single stacked layout, providing a cleaner interface and making navigation easier, especially for larger or more complex forms.